Octopii – An AI-powered Personal Identifiable Information (PII) Scanner

Octopii is an open-source AI-powered Personal Identifiable Information (PII) scanner that can look for image assets such as Government IDs, passports, photos and signatures in a directory.
Working
Octopii uses Tesseract’s Optical Character Recognition (OCR) and Keras’ Convolutional Neural Networks (CNN) models to detect various forms of personal identifiable information that may be leaked on a publicly facing location. This is done in the following steps:
1. Importing and cleaning image(s)
The image is imported via OpenCV and Python Imaging Library (PIL) and is cleaned, deskewed and rotated for scanning.
2. Performing image classification and Optical Character Recognition (OCR)
A directory is looped over and searched for images. These images are scanned for unique features via the image classifier (done by comparing it to a trained model), along with OCR for finding substrings within the image. This may have one of the following outcomes:
-
Best case (score >=90): The image is sent into the image classifier algorithm to be scanned for features such as an ISO/IEC 7810 card specification, colors, location of text, photos, holograms etc. If it is successfully classified as a type of PII, OCR is performed on it looking for particular words and strings as a final check. When both of these are confirmed, the result from Octopii is extremely reliable.
-
Average case (score >=50): The image is partially/incorrectly identified by the image classifier algorithm, but an OCR check finds contradicting substrings and reclassifies it.
-
Worst case (score >=0): The image is only identified by the image classifier algorithm but an OCR scan returns no results.
-
Incorrect classification: False positives due to a very small model or OCR list may incorrectly classify PIIs, giving inaccurate results.
As a final verification method, images are scanned for certain strings to verify the accuracy of the model.
The accuracy of the scan can determined via the confidence scores in output. If all the mentioned conditions are met, a score of 100.0 is returned.
To train the model, data can also be fed into the model_generator.py script, and the newly improved h5 file can be used.
Usage
- Install all dependencies via
pip install -r requirements.txt. - Install the Tesseract helper locally via
sudo apt install tesseract-ocr -y(for Ubuntu/Debian). - To run Octopii, type
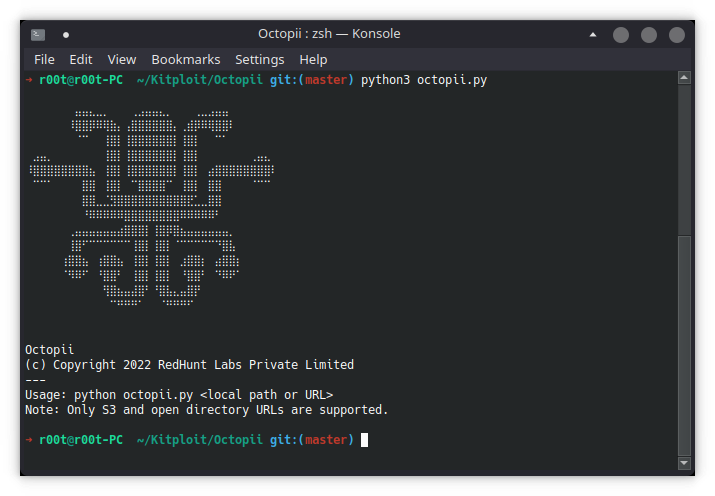
python3 octopii.py <location name>, for examplepython3 octopii.py pii_list/
python3 octopii.py <location to scan> <additional flags>
Octopii currently supports local scanning and scanning S3 directories and open directory listings via their URLs.
Example
Open-source projects like these thrive on community support. Since Octopii relies heavily on machine learning and optical character recognition, contributions are much appreciated. Here’s how to contribute:
1. Fork
Fork the official repository at https://github.com/redhuntlabs/octopii
2. Understand
There are 3 files in the models/ directory. – The keras_models.h5 file is the Keras h5 model that can be obtained from Google’s Teachable Machine or via Keras in Python. – The labels.txt file contains the list of labels corresponding to the index that the model returns. – The ocr_list.json file consists of keywords to search for during an OCR scan, as well as other miscellaneous information such as country of origin, regular expressions etc.
Generating models via Teachable Machine
Since our current dataset is quite small, we could benefit from a large Keras model of international PII for this project. If you do not have expertise in Keras, Google provides an extremely easy to use model generator called the Teachable Machine. To use it:
- Visit https://teachablemachine.withgoogle.com/train and select ‘Image Project’ → ‘Standard Image Model’.
- A few classes are visible. Rename the class to an asset type ypu’d like to upload, such as “German Passport” or “California Driver License”.
- Add images by clicking the ‘Upload’ button and upload some image assets. Note: images have to be square
Tip: segregate your image assets into folders with the folder name being the same as the class name. You can then drag and drop a folder into the upload dialog.
- Click ‘+ Add a class’ at the bottom of the page to add more classes with data and repeat. You can make the classes more specific, such as “Goa Driver License Old Format”.
Note: Only upload the same as the class name, for example, the German Passport class must have German Passport pictures. Uploading the wrong data to the wrong class will confuse the machine learning algorithms.
- Verify the classes and images one last time. Once you’re ready, click on the ‘Train Model’ button. You can increase the epoch size (such as 5000) to improve model accuracy.
- To test, you can test the model by clicking the Input dropdown and selecting ‘File’, then uploading a sample image.
- Once you’re ready, click the ‘Export Model’ button. In the dialog that pops up, select the ‘Tensorflow’ tab (not Tensorflow.js) and select the ‘Keras’ radio button, then click ‘Download my model’ to export the newly generated model. Extract the downloaded zip file and paste the
keras_model.h5file andlabels.txtfile into themodels/directory in Octopii.
The images used for the model above are not visible to us since they’re in a proprietary format. You can use both dummy and actual PII. Make sure they are square-ish in image size.
Updating OCR list
Once you generate models using Teachable Machine, you can improve Octopii’s accuracy via OCR. To do this:
- Open the existing
ocr_list.jsonfile. Create a JSONObject with the key having the same name as the asset class. NOTE: The key name must be exactly the same as the asset class name from Teachable Machine. - For the
keywords, use as many unique terms from your asset as possible, such as “Income Tax Department”. Store them in a JSONArray. - (Advanced) you can also add regexes for things like ID numbers and MRZ on passports if they are unique enough. Use https://regex101.com to test your regexes before adding them.
- Save/overwrite the existing
ocr_list.jsonfile.
3. Edit
You can replace each file you modify in the models/ directory after you create or edit them via the above methods.
4. Pull request
Submit a pull request from your forked repo and we’ll pick it up and replace our current model with it if the changes are large enough.
Note: Please take the following steps to ensure quality
- Make sure the model returns extremely accurate results by testing it locally first.
- Use proper text casing for label names in both the Keras model and
ocr_list.json. - Make sure all JSON is valid with appropriate character escapes with no duplicate keys, regexes or keywords.
- For country names, please use the ISO 3166-1 alpha-2 code of the country.
Credits
- BeautifulSoup
- Tesseract
- Keras
- SciKit
- Python Image Library
- Spaces – DigitalOcean
- Teachable Macine – Google
License
MIT License
(c) Copyright 2022 RedHunt Labs Private Limited
Author: Owais Shaikh
If you like the site, please consider joining the telegram channel or supporting us on Patreon using the button below.


![Cobalt Strike Beacon Detected - 156[.]224[.]29[.]3:443 3 Cobalt-Strike](https://www.redpacketsecurity.com/wp-content/uploads/2021/11/Cobalt-Strike-300x201.jpg)
